
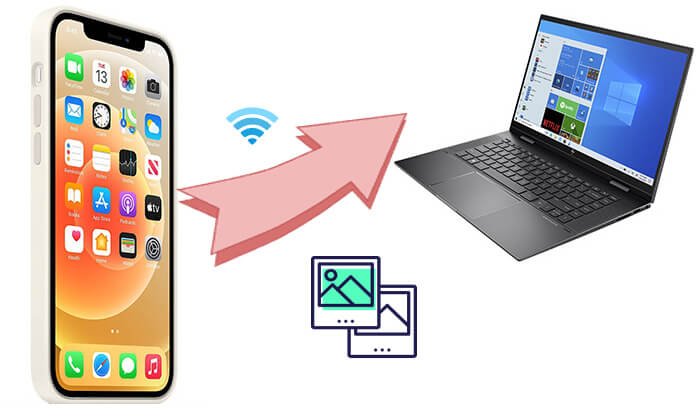
How to Transfer Photos from iPhone to PC Wirelessly: A Complete Guide
Transferring photos from your iPhone to a PC is a routine task, but many people still rely on cables or third-party software to get it done. However, with advancements in wireless technologies, it’s now easier than ever to transfer photos without needing a physical connection. Whether you’re trying to free up space on your iPhone or back up precious memories, this guide will help you transfer photos from your iPhone to PC wirelessly using several methods.
Why Transfer Photos Wirelessly?
Before diving into the methods, it’s important to understand the benefits of transferring photos wirelessly:
- Convenience: You don’t need to worry about cables, especially if you’re transferring multiple photos or doing so from different locations.
- No Physical Connection Required: It eliminates the hassle of constantly plugging and unplugging your iPhone from your PC, and you don’t need to worry about USB ports.
- Faster Process: Depending on the method, wireless transfers can be quicker and more seamless, especially with cloud storage syncing automatically.
Now, let’s explore the best ways to wirelessly transfer photos from your iPhone to your PC.
1. Using iCloud Photos
iCloud is Apple’s cloud storage solution, and it’s one of the easiest ways to sync your iPhone photos to your PC wirelessly. Once you enable iCloud Photos on your iPhone, your photos are automatically uploaded to iCloud, allowing you to access them from any device with the same Apple ID.
Steps to Transfer Photos Using iCloud:
- Enable iCloud Photos on Your iPhone:
- Open the Settings app on your iPhone.
- Tap on your name at the top to go to Apple ID settings.
- Select iCloud, then tap Photos.
- Toggle the iCloud Photos option to ON.
- Install iCloud for Windows on Your PC:
- Download and install iCloud for Windows from the official Apple website.
- After installation, open iCloud and sign in with the same Apple ID you use on your iPhone.
- Download Photos from iCloud to Your PC:
- Once iCloud for Windows is set up, open the iCloud application on your PC.
- Ensure that Photos is checked in the iCloud settings.
- Click Apply to sync your photos.
- Open the iCloud Photos folder on your PC (you’ll find it in File Explorer), and from there, you can download any photos you want.
2. Using Google Photos
Google Photos offers a cloud-based service that allows you to back up photos from your iPhone wirelessly. Once your photos are uploaded to Google Photos, you can access them on your PC via a web browser and download them at your convenience.
Steps to Transfer Photos Using Google Photos:
- Download the Google Photos App:
- Install the Google Photos app from the App Store on your iPhone.
- Back Up Photos to Google Photos:
- Open Google Photos, and sign in with your Google account.
- Tap on your profile icon in the top-right corner and select Photos settings.
- Choose Back up & sync, and ensure it is turned on to automatically back up all new photos and videos.
- Access Photos on Your PC:
- Open a web browser on your PC and visit photos.google.com.
- Sign in with the same Google account.
- Browse your photos, and select the ones you want to download.
- Click the three dots (more options) in the upper-right corner, and select Download.
3. Using AirDrop (For Mac Users)
Although AirDrop is not available for PCs, if you have a Mac, you can use it to transfer photos wirelessly from your iPhone to your Mac, and then to your PC via cloud services or external drives.
Steps to Transfer Photos Using AirDrop:
- Enable AirDrop on Your iPhone and Mac:
- On your iPhone, swipe down from the top-right corner to open Control Center.
- Tap and hold the network settings block, then tap AirDrop and select Everyone or Contacts Only.
- On your Mac, open Finder, click on AirDrop in the sidebar, and set it to accept files from Everyone or Contacts.
- Send Photos via AirDrop:
- On your iPhone, open the Photos app and select the photos you want to transfer.
- Tap the Share icon, then select your Mac’s name under the AirDrop section.
- Transfer Photos to Your PC:
- Once the photos are on your Mac, you can either upload them to a cloud service like iCloud or Google Photos or transfer them to your PC via a USB drive or an external hard drive.
4. Using Dropbox
Dropbox is another cloud storage solution that can be used to transfer photos wirelessly from your iPhone to your PC. After uploading your photos to Dropbox, you can access them on any device with Dropbox installed, including your PC.
Steps to Transfer Photos Using Dropbox:
- Install the Dropbox App on Your iPhone:
- Download the Dropbox app from the App Store and log in with your Dropbox account.
- Upload Photos to Dropbox:
- Open the Dropbox app on your iPhone.
- Tap the + icon and select Upload Photos.
- Choose the photos you wish to upload to Dropbox.
- Download Photos on Your PC:
- Open a browser on your PC and go to the Dropbox website (www.dropbox.com).
- Sign in to your account, locate the photos you uploaded, and download them to your PC.
5. Using OneDrive
OneDrive, Microsoft’s cloud storage service, allows you to upload and access photos across different devices, including your iPhone and PC. Once your photos are uploaded to OneDrive, you can easily access and download them from your PC.
Steps to Transfer Photos Using OneDrive:
- Install the OneDrive App on Your iPhone:
- Download the OneDrive app from the App Store and sign in with your Microsoft account.
- Upload Photos to OneDrive:
- Open OneDrive, tap the + icon, and select Upload to upload your photos from your iPhone.
- Access Photos on Your PC:
- Open OneDrive on your PC (either through the app or via the OneDrive website) and download the photos.
Conclusion
Transferring photos wirelessly from your iPhone to a PC is easier than ever with cloud services like iCloud, Google Photos, Dropbox, and OneDrive. Each method offers its own advantages, from automatic syncing with iCloud to the flexibility of Google Photos and Dropbox. The best method depends on your preferences and the services you already use, but all of these options ensure that you can transfer your photos seamlessly, without the need for any cables.