
How to Make Cold Brew Coffee Without a Mason Jar
Cold brew coffee has become a popular choice for coffee lovers who prefer a smooth, rich, and less acidic alternative to traditional hot coffee. While mason jars are often the go-to container for making cold brew at home, not everyone has one on hand. The good news is that making cold brew coffee without a mason jar is entirely possible. In fact, you can use several other kitchen items to make a delicious batch of cold brew.
In this article, we’ll walk you through a simple, effective method for making cold brew coffee without needing a mason jar, as well as provide tips for getting the perfect cup every time.
What Is Cold Brew Coffee?
Before we dive into the brewing process, let’s clarify what cold brew coffee is. Cold brew coffee is made by steeping coarsely ground coffee beans in cold or room temperature water for an extended period of time—typically 12 to 24 hours. This method results in a coffee that is smoother, sweeter, and less acidic than hot-brewed coffee.
Unlike iced coffee, which is brewed hot and then cooled, cold brew coffee extracts its flavor at a slower rate, giving it a unique taste profile. The longer the steeping time, the stronger and more concentrated the coffee becomes.
What You Need to Make Cold Brew Coffee Without a Mason Jar
While mason jars are a convenient option for cold brew, there are other kitchen tools that work just as well. Here’s what you’ll need:
- A large container (alternative to a mason jar): You can use any large bowl, pitcher, or even a plastic or glass bottle. Just make sure it has enough room to hold the water and coffee grounds.
- Coarse coffee grounds: Freshly ground coffee is best, but you can buy pre-ground coffee labeled for cold brew. The coarseness of the grind is crucial—too fine, and your coffee may end up bitter and cloudy.
- Cold or room temperature water: Use clean, filtered water for the best flavor. Avoid tap water that may contain chlorine or other chemicals that can alter the taste of your coffee.
- A fine mesh strainer or coffee filter: This is essential for straining out the coffee grounds after brewing. A cheesecloth or nut milk bag can also work well as an alternative.
- A spoon or stirrer: For mixing the coffee grounds and water together.
- A refrigerator: Cold brew coffee needs to steep in a cool place, so you’ll need access to a fridge.
Step-by-Step Guide to Making Cold Brew Coffee Without a Mason Jar
Step 1: Measure the Coffee and Water
Start by measuring the amount of coffee you’ll need. The general ratio for cold brew is 1 cup of coarsely ground coffee to 4 cups of cold or room temperature water. You can adjust this ratio based on how strong you like your cold brew. If you want a stronger brew, use less water, or add more coffee grounds for a more intense flavor.
- For a milder brew: Use 1 cup of coffee grounds to 5 cups of water.
- For a stronger brew: Use 1 cup of coffee grounds to 3 cups of water.
Step 2: Combine Coffee Grounds and Water
Take your large container (pitcher, bowl, or bottle) and add the measured coffee grounds to it. Then, pour the water over the grounds, making sure that all of the coffee is fully submerged. Stir gently to ensure even saturation.
If you’re using a pitcher or large bowl, you may want to cover the container with plastic wrap or a lid to prevent any contaminants from getting inside while the coffee is steeping.
Step 3: Let the Coffee Steep
Place your container in the refrigerator to steep for 12 to 24 hours. The longer the steeping time, the stronger and more flavorful the coffee will be. You can experiment with the steeping time to see what suits your taste preferences best.
If you prefer a slightly lighter brew, aim for the 12-hour mark. For a richer, bolder flavor, let it steep for 24 hours. Be sure to check the coffee once or twice during the steeping process to ensure the grounds are evenly distributed.
Step 4: Strain the Coffee
Once the coffee has steeped to your desired strength, it’s time to strain the grounds. Place a fine mesh strainer over a clean container (another pitcher, bowl, or jug) and slowly pour the coffee through it. You can also use a cheesecloth or coffee filter for an even finer strain.
If you used a large bowl, carefully transfer the coffee from the bowl to your strainer container. Let the coffee drip through the strainer for a few minutes, gently pressing down on the grounds with the back of a spoon to extract as much coffee as possible.
Step 5: Serve and Enjoy
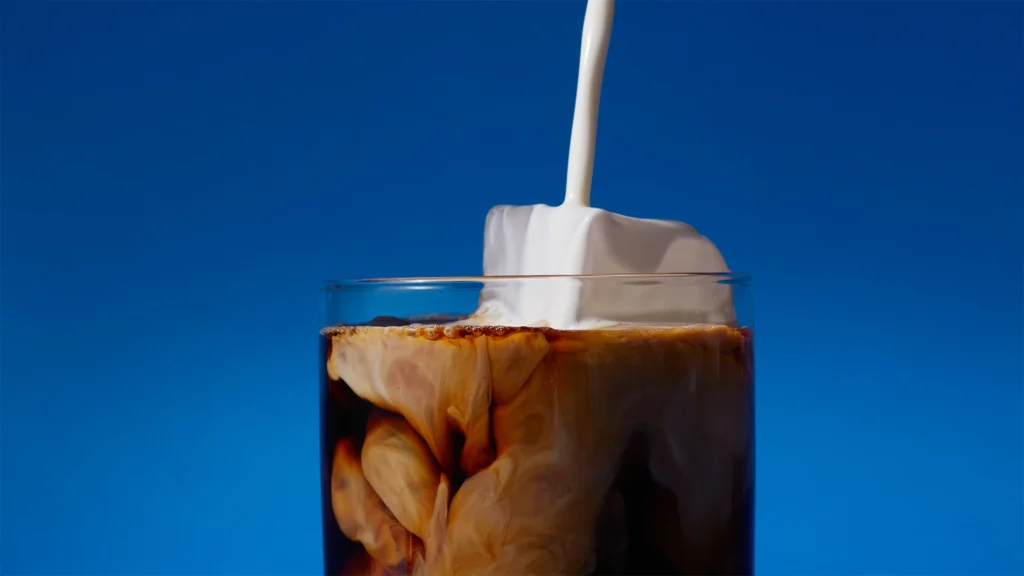
Now that you’ve strained the coffee, you’re ready to enjoy your homemade cold brew! Pour the cold brew into a glass filled with ice, and you can add milk, cream, or your favorite sweetener to taste.
You can also store the leftover cold brew in the refrigerator for up to two weeks. Cold brew is highly concentrated, so feel free to dilute it with more water or milk if it’s too strong for your taste.
Tips for Perfect Cold Brew Coffee
- Use freshly ground coffee: Freshly ground coffee beans yield the best results in cold brew. If you can, grind your beans just before brewing. Aim for a coarse grind to prevent over-extraction and bitterness.
- Adjust the steeping time: The longer the coffee steeps, the stronger and richer it will become. Start with 12 hours, and adjust based on how you like your coffee.
- Use filtered water: Since cold brew coffee relies on the water for extraction, using filtered water can improve the flavor and prevent any unpleasant tastes from tap water.
- Experiment with flavorings: Cold brew coffee is versatile. You can infuse it with flavors like cinnamon, vanilla, or cocoa nibs by adding them to the coffee grounds before steeping. This will give your cold brew a unique twist.
- Keep it cold: For the best taste, serve cold brew over ice. The last thing you want is to dilute it with hot water or milk.
Alternatives to a Mason Jar for Cold Brew
- Glass pitcher: A glass pitcher with a lid works perfectly for making cold brew. Its design allows for easy pouring, and the lid keeps the coffee covered during the steeping process.
- Plastic container: If you don’t have a glass container, any clean plastic container will work. Just make sure it’s large enough to hold the water and grounds comfortably.
- Large bottle or jug: A clean, large plastic or glass bottle works as a great alternative for brewing cold brew. If you use a bottle, just ensure it’s wide enough for easy stirring.
- Coffee dripper: If you have a coffee dripper or pour-over cone, you can use it to filter the cold brew coffee after steeping. This method is slightly more labor-intensive but still effective.
Conclusion
Making cold brew coffee without a mason jar is simple and effective, and you can easily adapt the method to suit whatever containers you have available in your kitchen. With the right ratio of coffee grounds to water, a steeping period of 12 to 24 hours, and a reliable straining method, you’ll be able to enjoy smooth, rich cold brew coffee right at home.
Whether you’re using a glass pitcher, a plastic container, or even a bottle, the result will be the same—refreshing, caffeine-packed cold brew that can be enjoyed straight, over ice, or mixed with your favorite add-ins. So, next time you’re craving cold brew, skip the mason jar and use what you’ve got—it’s easier than you think!