
How to Create Dried Fruit Snacks Using Your Oven?
I’ll never forget my grandmother’s kitchen filled with the warm aroma of slowly drying apples and pears. She taught me that oven drying transforms ordinary fruit into concentrated flavor bombs that put store-bought versions to shame. After years of perfecting this technique to create dried fruit snacks using your oven in my own kitchen and teaching food preservation classes, I’ve discovered that oven drying is one of the most rewarding and economical kitchen skills you can master.
Why Oven Drying Beats Store-Bought Alternatives
Understanding the benefits makes the process worthwhile:
- Flavor control: No added sugars or preservatives
- Cost efficiency: 70% cheaper than commercial dried fruits
- Quality assurance: You control the ingredient quality
- Customization: Create unique flavor combinations
- Food waste reduction: Preserve seasonal abundance
Key Drying Science Terms
- Dehydration: Removal of water to prevent spoilage
- Enzyme activity: Natural processes that affect color and flavor
- Case hardening: Surface drying too quickly that traps moisture
- Equilibrium moisture: Ideal water content for preservation
Step-by-Step Oven Drying Method
Fruit Selection and Preparation
- Choose ripe but firm fruit: Avoid overripe or bruised pieces
- Wash thoroughly: Use vinegar solution for waxy fruits
- Uniform slicing: ¼-inch thickness for even drying
- Pre-treatment: Lemon juice bath to prevent browning
The Drying Process
- Preheat oven: 140-160°F (60-71°C) – lowest possible setting
- Prepare baking sheets: Line with parchment paper
- Arrange fruit: Single layer with space between pieces
- Oven positioning: Use middle rack for even heat
- Door propping: Keep slightly ajar with wooden spoon handle
- Rotate regularly: Every hour for even drying
- Check doneness: 4-12 hours depending on fruit type
Pro Tip: Use oven thermometer to verify accurate temperature
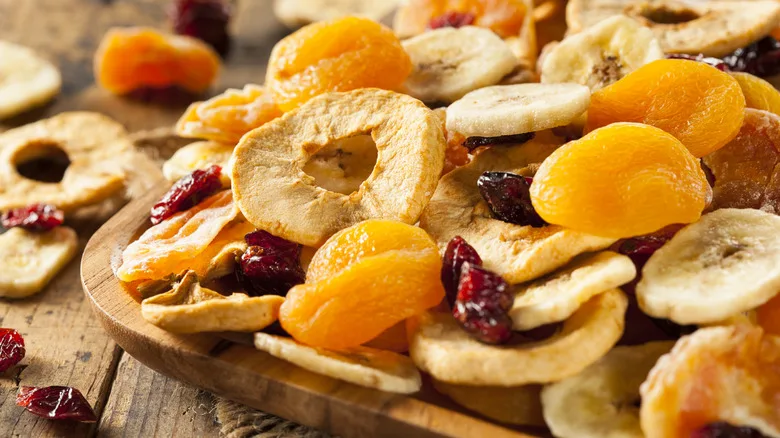
Fruit-Specific Drying Guidelines
| Fruit Type | Preparation | Temperature | Time | Doneness Test |
|---|---|---|---|---|
| Apples | ¼” slices, pretreated | 140°F | 6-8 hours | Leathery, no moisture |
| Bananas | ¼” slices, lemon dipped | 140°F | 6-10 hours | Chewy, not crisp |
| Berries | Whole, blanched first | 140°F | 8-12 hours | Shrunken, chewy |
| Stone fruits | Halved or sliced | 140°F | 8-14 hours | Pliable but dry |
| Citrus | ¼” slices | 140°F | 6-8 hours | Crisp, translucent |
The Science Behind Successful Drying
Understanding the physical processes:
- Moisture migration: Water moves from inside to surface
- Evaporation rate: Controlled by temperature and air flow
- Sugar concentration: Natural sugars preserve and flavor
- Enzyme inactivation: Heat stops spoilage mechanisms
Troubleshooting Common Issues
Problem: Fruit browning excessively
Solution: Use ascorbic acid dip instead of lemon juice
Problem: Sticky or tacky fruit
Solution: Extend drying time by 1-2 hours
Problem: Uneven drying
Solution: Rotate trays more frequently and check hot spots
Problem: Hard outer layer with moist center
Solution: Lower temperature and increase drying time
Advanced Techniques
For professional results:
- Blanching first: For vegetables and some fruits
- Sugar syrup dipping: For sweeter results (1:1 sugar:water)
- Spice infusion: Add cinnamon or nutmeg to pretreatment
- Layered flavors: Brush with honey or maple syrup mid-dry
Storage and Preservation
Conditioning: Place in sealed container for 7-10 days to equalize moisture
Packaging: Airtight containers with oxygen absorbers
Location: Cool, dark, dry place (not refrigerator)
Shelf life: 6-12 months properly stored
Creative Recipe Ideas
Beyond simple snacking:
- Trail mix: Combine with nuts and seeds
- Baking: Add to muffins and breads
- Rehydration: For sauces and compotes
- Powdered fruit: Grind for natural flavoring
FAQs
Q. Can I dry different fruits together?
A. Not recommended – different moisture contents and drying times can cause issues.
Q. Why is my oven’s lowest setting higher than 140°F?
A. Use oven thermometer and prop door open wider to maintain lower temperature.
Q. How do I know when fruit is properly dried?
A. Fruit should be leathery or crisp (depending on type) with no visible moisture when torn.
Q. Can I use convection oven setting?
A. Yes – convection actually improves drying efficiency with better air circulation.
Q. Why did my fruit turn out crispy instead of chewy?
A. Over-dried – remove from oven sooner next time and condition in sealed container.
Historical Context
Food drying evolution:
- Ancient methods: Sun drying and air drying
- Pioneer techniques: Smokehouse drying and string drying
- Modern home drying: Oven methods and food dehydrators
- Commercial drying: Freeze drying and spray drying
Alternative Drying Methods
When oven isn’t optimal:
- Food dehydrator: Most consistent results
- Air drying: For herbs and some fruits
- Sun drying: Traditional but weather-dependent
- Microwave drying: Quick but uneven for fruits
Safety Considerations
- Temperature monitoring: Must stay below 160°F to prevent cooking
- Mold prevention: Ensure complete dryness before storage
- Cleanliness: Start with clean fruit and equipment
- Storage checks: Inspect periodically for moisture or mold
Final Thoughts
Oven drying is a gateway to the rewarding world of food preservation that connects us to traditional kitchen wisdom while providing healthy, economical snacks. I’ve filled countless jars with oven-dried fruits that capture summer’s bounty for year-round enjoyment. The process to create dried fruit snacks using your oven requires patience but rewards you with superior flavor and the satisfaction of self-sufficiency.
Remember: low temperature, good air circulation, and proper storage are the keys to success. With practice, you’ll develop an instinct for perfect drying that will serve you for years to come.