
How to Cook a Panini With an Iron?
I’ll never forget my college dorm days when I craved a pressed sandwich but only had a clothing iron and a dream. Through much trial and error (and a few minor disasters), I perfected the art of iron panini pressing. While I don’t necessarily recommend this as your primary cooking method to cook a panini with an iron, it’s a fascinating culinary hack that can save the day when you’re without proper kitchen equipment.
Why Consider Iron Panini Pressing?
Understanding the limited circumstances where this makes sense:
- Emergency situations: When no other cooking equipment is available
- College dorms: Where hot plates might be prohibited
- Travel scenarios: Hotel rooms without kitchen facilities
- Novelty factor: Interesting party trick or conversation starter
- Minimalist living: Extremely limited kitchen space
Key Panini Pressing Terms
- Grill marks: Characteristic sear marks from pressed cooking
- Melting point: Temperature where cheese properly melts
- Heat distribution: Even spreading of heat across surfaces
- Pressure cooking: Using weight and heat simultaneously
Critical Safety Considerations
Essential Precautions
- Use a barrier: Always place foil or parchment between iron and food
- Temperature control: Start with lower heat settings
- Stable surface: Work on heat-resistant counter or cutting board
- Ventilation: Some smoke may occur – open windows if possible
- Clean iron thoroughly: Before and after food use
Required Safety Gear
- Oven mitts or thick towels
- Aluminum foil or parchment paper
- Heat-resistant surface protector
- Fire extinguisher (as precaution)
Step-by-Step Iron Panini Method
Preparation Phase
- Assemble sandwich: Use ingredients that melt easily
- Choose bread wisely: Softer breads work better than crusty artisanal
- Prepare iron: Clean plate thoroughly with alcohol wipes
- Create foil barrier: Double layer of heavy-duty aluminum foil
Cooking Process
- Preheat iron: Medium heat setting (no steam)
- Wrap sandwich: Completely enclose in foil packet
- Place on protected surface: Heat-resistant cutting board
- Apply iron gently: Don’t press down excessively
- Cook for 3-4 minutes: Check frequently
- Flip carefully: Use tongs or oven mitts
- Cook second side: Until golden brown and cheese melted
- Rest before eating: Foil will be extremely hot
Important: This works best for melting rather than actual cooking
Ingredient Selection Guide
| Ingredient Type | Iron-Friendly | Notes | Alternatives |
|---|---|---|---|
| Bread | Soft white or wheat | Presses easily | Avoid thick crusts |
| Cheese | Pre-sliced American | Melts quickly | Shredded works well |
| Meats | Pre-cooked only | Already safe to eat | No raw meats |
| Vegetables | Thinly sliced | Cook quickly | Avoid watery veggies |
Troubleshooting Common Issues
Problem: Sandwich sticking to foil
Solution: Lightly oil foil interior or use parchment paper
Problem: Uneven heating
Solution: Rotate iron position frequently
Problem: Bread burning
Solution: Lower heat setting and reduce time
Problem: Cheese not melting
Solution: Use thinner slices and press longer gently
Alternative Methods
Better options when available:
- Skillet method: Use heavy pan as press on stove
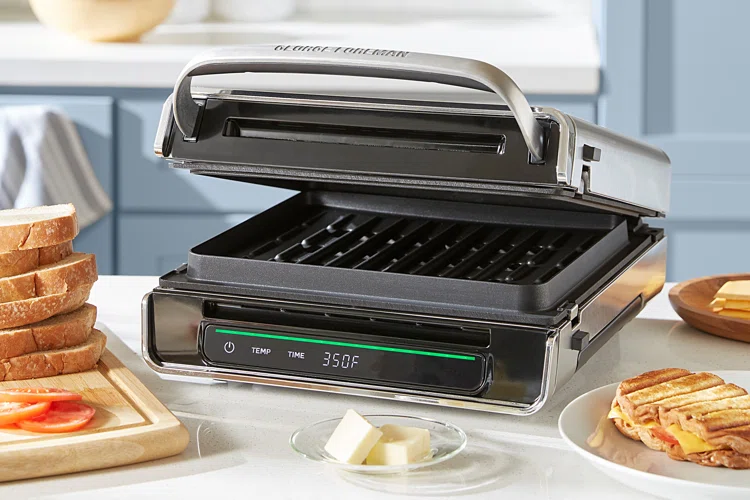
- George Foreman grill: Designed for this purpose
- Oven baking: Broil briefly for melting effect
- Store-bought presses: Inexpensive dedicated equipment
Legal and Practical Considerations
- Appliance warranty: May void iron manufacturer warranty
- Cleanliness concerns: Food residues difficult to remove completely
- Flavor transfer: Possible transfer of chemical tastes to food
- Safety regulations: Many dorms prohibit appliance misuse
FAQs
Q. Is this method actually safe?
A. It carries risks including burns, fire hazard, and potential chemical transfer from iron to food.
Q. Will my iron taste like food afterward?
A. Possibly – thorough cleaning with vinegar can help remove odors.
Q. Can I use steam function?
A. Absolutely not – water and electricity create serious shock hazards.
Q. What about non-stick coating safety?
A. Heating non-stick surfaces for cooking may release chemicals – use foil barrier.
Q. Could I damage my iron?
A. Yes – food residues can damage coating and internal components.
Historical Context
Improvised cooking methods:
- College traditions: Decades of dorm room innovation
- Budget cooking: Economic necessity inspiring creativity
- DIY culture: Making do with available resources
- Safety evolution: Increased awareness of risks
Realistic Alternatives
For better panini results:
- Panini presses: Inexpensive and designed for purpose
- Skillet press: Heavy pan on sandwich in regular skillet
- Oven method: Bake at 400°F with weighted foil on top
- Toaster oven: Many have panini settings now
Final Thoughts
While the iron panini method demonstrates human ingenuity in constrained circumstances, it’s important to recognize its significant limitations and risks. The novelty factor is fun, but the practical challenges and safety concerns make this more of a last-resort option than a recommended cooking technique to cook a panini with an iron.
If you do attempt this, prioritize safety above all else – use proper barriers, maintain constant supervision, and have fire safety equipment nearby. But honestly? You’re probably better off investing in a $20 panini press or using alternative cooking methods.