
How to Remove Fat From Soup, Casserole, or Stew?
I’ll never forget the first time I served what I thought was a perfect beef stew, only to watch my dinner guests discreetly push aside the oily slick on top. After years in professional kitchens and countless batches of soups and stews, I’ve mastered every fat-removal technique imaginable. Whether you’re dealing with a rich chicken soup or a hearty beef stew, these methods to remove fat from soup, casserole, or stew will transform greasy dishes into clean, flavorful masterpieces.
Why Fat Removal Matters Beyond Health
Understanding the full impact helps motivate the process:
- Flavor clarity: Fat can mask subtle flavors
- Texture improvement: Prevents greasy mouthfeel
- Visual appeal: Eliminates unappetizing oil slicks
- Digestibility: Reduces heavy, greasy aftereffects
Key Culinary Fat Terms
- Rendered fat: Liquid fat released during cooking
- Emulsification: When fat and liquid combine permanently
- Capillary action: How fat moves up cooling liquids
- Lipids: The scientific term for fats and oils
5 Effective Fat Removal Methods
1. The Chill and Scoop Method (Most Effective)
Steps:
- Refrigerate dish for 2-4 hours until fat solidifies
- Use spoon to lift off solidified fat layer
- Discard or reserve for other uses
- Reheat gently before serving
Best For: Stews, casseroles, and thick soups
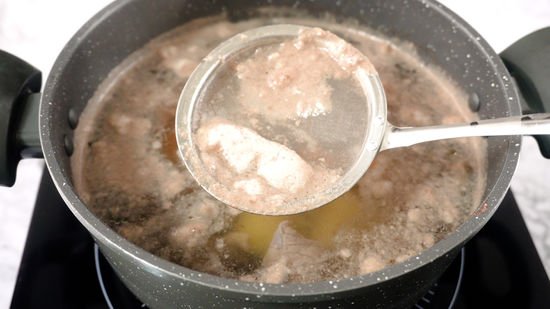
2. The Ladle Technique (Quickest)
Steps:
- Tilt pot to pool fat on one side
- Use ladle to skim surface
- Drag ladle edge across surface
- Wipe ladle between dips
3. The Ice Cube Trick (Surprisingly Effective)
Steps:
- Tie ice cube in cheesecloth
- Drag across soup surface
- Fat solidifies on contact
- Rinse and repeat
4. The Paper Towel Method (For Small Amounts)
Steps:
- Lay paper towel on surface
- Lift quickly – fat absorbs instantly
- Repeat with fresh towels
- Works best on thinner soups
5. The Fat Separator (Tool-Based Solution)
Steps:
- Pour liquid into separator
- Let stand for 1-2 minutes
- Pour from spout – fat stays behind
- Works for gravies and broths
Fat Removal Method Comparison
| Method | Effectiveness | Speed | Best For | Equipment Needed |
|---|---|---|---|---|
| Chill & Scoop | 95% | Slow | All types | Refrigerator |
| Ladle Skimming | 75% | Fast | Soups | Ladle |
| Ice Cube | 65% | Medium | Broths | Ice, cheesecloth |
| Paper Towel | 60% | Fast | Small batches | Paper towels |
| Fat Separator | 90% | Medium | Liquids | Special tool |
The Science Behind Fat Separation
Understanding why these methods work:
- Density difference: Fat floats on water-based liquids
- Solidification point: Animal fats solidify when chilled
- Surface tension: Fat collects at edges and surfaces
- Viscosity variance: Thicker fats separate more easily
Prevention Better Than Removal
Smart cooking techniques reduce fat from the start:
- Trim visible fat from meats before cooking
- Use lean cuts when possible
- Brown meat properly to render fat effectively
- Deglaze pan to incorporate flavors without excess fat
Troubleshooting Common Problems
Problem: Fat won’t separate
Solution: Add cold water to encourage separation
Problem: Removing too much flavor
Solution: Reserve some fat to add back if needed
Problem: Emergency removal needed
Solution: Use bread slice to absorb surface fat
Problem: Cloudy broth after removal
Solution: Strain through cheesecloth after skimming
Advanced Techniques
For professional results:
- Clarification: Egg white raft method for crystal clear consommé
- Double straining: Through fine mesh and cheesecloth
- Temperature control: Specific heating and cooling cycles
- Natural emulsifiers: Using ingredients that bind fat properly
Creative Uses for Removed Fat
Don’t just discard – repurpose:
- Cooking fat: For roasting vegetables
- Flavor base: For sautéing aromatics
- Bird feeder: Mixed with seeds in winter
- Compost additive: In small quantities
FAQs
Q. Does cooling affect food safety?
A. Proper cooling (under 2 hours) is safe. Never leave at room temperature.
Q. Can I use these methods for vegetarian dishes?
A. Yes – plant oils separate similarly, though they may not solidify.
Q. Why does my fat have a cloudy appearance?
A. This indicates some water or protein content – still safe to remove.
Q. How much fat should I remove?
A. Personal preference – taste as you go to find your ideal balance.
Q. Can I reuse the removed fat?
A. Yes, for cooking, but use within a week and refrigerate.
Historical Methods
Traditional fat removal techniques:
- Lettuce leaves: Natural fat absorbers
- Cold stone: Dropped into pots to solidify fat
- Bread slices: Floating absorbers
- Ice water: Rapid cooling in shallow pans
Alternative Dietary Approaches
For different dietary needs:
- Low-fat versions: Use lean meats and skim during cooking
- Keto-friendly: Minimal removal for high-fat needs
- Heart-healthy: Maximum removal with careful monitoring
- Cultural traditions: Some cuisines prefer higher fat content
Safety Considerations
- Cool properly: Avoid temperature danger zone
- Handle carefully: Hot fats can cause burns
- Storage timing: Refrigerate within 2 hours
- Reheating: Bring to proper temperature before serving
Final Thoughts
That layer of fat on your beautiful homemade soup doesn’t have to mean compromising on flavor or health. I’ve used these techniques in everything from busy restaurant kitchens to quiet home dinners, and the transformation never fails to impress. The difference between a greasy stew and a clean, flavorful one isn’t just about health – it’s about respecting the ingredients and allowing their true flavors to shine.
Remember: the best method depends on your time, tools, and the specific dish. With these techniques to remove fat from soup, casserole, or stew, in your culinary toolkit, you’ll never have to serve (or eat) a greasy soup again.